Photography is a way to be creative. Whether it be by taking regular landscape photographs to making the most surreal and abstract images you can think of. Another cool fun technique you can try is light painting. The gist of light painting is, well you guessed it, to paint with light. In this article I'll be telling you how it works, what kinds of light painting there are and how you can try it for yourself.
So how does light painting work? First we need to know how a camera works and how lighting works.
A camera captures the light that is reflected from the different surfaces around you. If there is a lot of light, your camera won't have any trouble capturing it. If there's no or little light however, then it takes longer to gather all the information to create a good photograph. Your camera compensates for the lack of light by using a longer shutter speed.
So, how does this apply to light painting? When you are painting with lights you are going to use the fact that your environment reflects little light and you are going to use a light source that emits a lot of light.
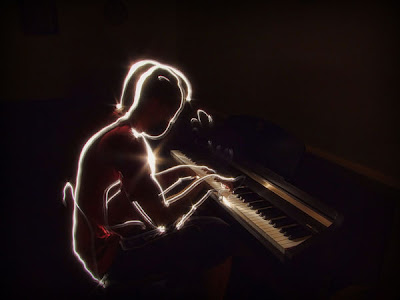
There are a couple of different kinds of light painting. The first kind is when you are moving your light source. This will create long streaks of light that can take any shape or form. This is one of the most fun techniques I've ever come across with. It really gives you a chance to use your imagination and create beautiful images.
A second technique is moving your camera. This will almost always blur the whole image and this will create a very abstract effect.
Now let's try it for ourselves. You are going to need a couple of things before you can start this light painting tutorial.The first thing is obviously a camera. This doesn't have to be a super fancy reflex camera but the more settings you can customize the more control you will have over the quality of the image. The most important setting you will be adjusting is the shutter speed. When there is little or no light your camera will probably automatically adjust itself but sometimes you want to change the setting and make the shutter speed even longer.
The second thing is a tripod. This is also very important because when you are light painting you are going to want to reduce the motion blur on the background while still maintaining the long shutter speed.
The third thing you are going to need is a light source. It really doesn't matter what kind of lights you are using but I've found that LED lights work best. They come in different shapes and sizes and you can easily draw a lot of different shapes with them.
Now comes the fun part. Go out at night and find a scene where you want to paint something. It can almost be anything. You can try painting faces or smileys on trash cans, write graffiti on the wall without doing anything illegal, etc.
Adjust your camera settings so it's using a long shutter speed and use a timer to set the camera off.
Now comes the painting part. Because the lights you are using are a lot brighter than the environment your camera will register it a lot better. The cool thing about this that while you are running in front of the camera trying out this nifty light painting tutorial, you probably wont be on the image itself. The movement you create is probably too fast for the camera to register, which leaves only the lines the lights create.
Now that we've come to the end of this light painting tutorial you know how to create nice painting with light. The next step is to go out and use your imagination.


